ေလာကဓာတ္ခန္း သာဂိ – Office Application in the Cloud (17)
(Cloud Computing Basics with Google App and Facebook)
(မိုးမခ) ဧျပီ ၂၈၊ ၂၀၁၇
The Toolbar Shortcut menu
အခုဒီအပိုင္းမွာ သင္ၾကားတာေတြကေတာ့ Google DOCS က User Interface (UI) ကေနတဆင့္ စာစီ စာရိုက္လုပ္တာမွာ format ခ်တာေတြ အသုံးခ်နည္း ျဖစ္ပါတယ္။

အေပၚမွာ ေတြ႔ရသလို toolbar ေပၚက shortcut menu ေတြ ပုံကလစ္ႏွိပ္စရာေတြကို အသုံးခ်ပုံ ျဖစ္ပါတယ္။
To change the font:
-
ေဖာင့္ကို ေျပာင္းခ်င္ရင္ စာသားကို အရင္ေရြးခ်ယ္ပါ။
-
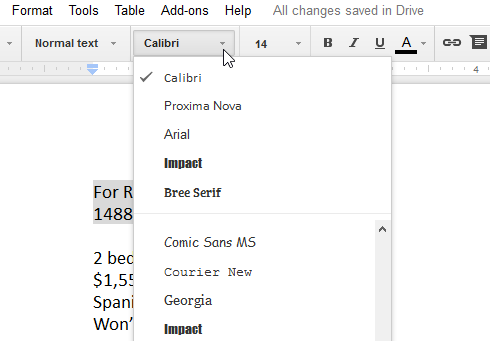
ေဖာင့္ ကို ဆြဲခ်ျပီးေတာ့ အလုိရွိရာ ေဖာင့္ စာလုံးဒီဇိုင္းကို ေျပာင္းပါ။ မေျပာင္းခင္မွာ မွတ္မိဖို႔က အရင္ဆုံး မူလေဖာင့္က ဘာနာမည္နဲ႔လဲ ဆိုတာကို အရင္ဆုံး ေတြ႔ရပါမယ္။ ဥပမာက ဆိုရင္ေတာ့ Calibri ေဖာင့္နဲ႔ ရုိက္ထားတာပါ။
-
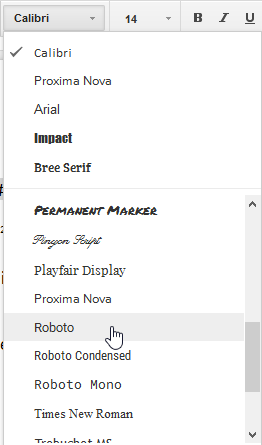
ျပီးေတာ့မွာ ဥပမာျပထားသလို Roboto font ဆိုတာကို ေရြးခ်ယ္ပါ။
-
ေရြးထားတဲ့ စာသားက ေဖာင့္ပုံစံကို ေျပာင္းလဲပစ္လိုက္တာကို ေတြ႔ရပါမယ္။
-

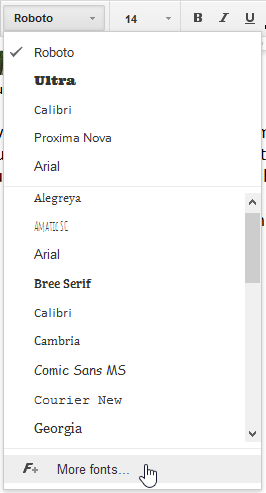
ဂူးဂဲေဒါ့မွာ ကိုယ္ၾကိဳက္တဲ့ ေဖာင့္မေတြ႔ရင္ တျခားေဖာင့္ေတြ ထပ္ရွာလို႔ ရပါတယ္။ အဲသည္ကို သြားခ်င္ရင္ Font Pulldown Menu ေအာက္ဆုံးမွာ More Font ကို ေရြးပါ။ သင္တန္းဆရာက ဒီေနရာမွာ အျခားေဖာင့္အသစ္ေတြနဲ႔ ေဖာ္မက္ခ်တာကို သင္ေပးႏိုင္ပါတယ္။ ျပီးေတာ့ ဗမာစာေဖာင့္ရိုက္မယ္ဆိုရင္ ဘေရာက္ဇာထဲကေန ဘယ္လို ေျပာင္းလို႔ရသလဲဆိုတာကိုလည္း သင္ျပေပးႏိုင္ပါတယ္။ သည္မွာေတာ့ ထပ္မေျပာျပေတာ့ပါဘူး။
To change font size:
-
ေဖာင့္ဆိုက္ အရြယ္အစား ေျပာင္းနည္းကို သင္တန္းဆရာက သရုပ္ျပေပးပါ။

-
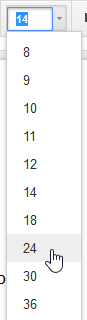
Font size ကေန အရြယ္အၾကီး အေသး ေျပာင္းျပပါ။

-
အခု ဥပမာမွကေတာ့ မူလ ၁၄ ပိြဳင့္ကေန ၂၄ ပိြဳင့္ကို ေျပာင္းတာ ျဖစ္ပါတယ္။
-
ေရြးခ်ယ္ထားတဲ့စာသားက ဆိုက္ေျပာင္းသြားပါတယ္။
To change text color:
-
ေဖာင့္ေတြရဲ့ ကာလာ အေရာင္ေျပာင္းတာကို သရုပ္ျပပါ။
-
-
Text color ကို ဆြဲခ်လိုက္ပါ။
-

-
အဲသည္မွာမွ မူလ အနက္ကေန အျပာေရာင္ ျဖစ္ျဖစ္ကို ေရြးခ်ယ္ပါ။

-
ေရြးထားတဲ့ စာသားရဲ့ အေရာင္ ေျပာင္းသြားပါတယ္။
To use the bold, italic, and underline buttons:
ေဖာင့္ေတြကို ရိုးရိုးစာသားအျဖစ္ကေန Bold ထင္းေအာင္လုပ္တာ။ Italic စာလုံးေစာင္းတာ။ Underline မ်ဥ္းေၾကာင္းဆြဲတာေတြကို သရုပ္ျပရပါတယ္။
-
ေျပာင္းခ်င္တဲ့ စာသားကို ေရြးပါ။
-
အခု မီးႏူးမွာ ျပထားတဲ့ အတိုင္း စာသားကို ေျပာင္းၾကည့္ခိုင္းပါ။ bold (B), italic (I), or underline (U)
To change text alignment:
စာသားေတြကို ဘယ္၊ ညာ၊ အလယ္ေခါင္၊ အားလုံးျဖန္႔ – စသည္ျဖင့္ ညိွတာေတြကိုလည္း သင္ေပးရပါမယ္။
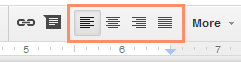
မီးႏူးဘားမွာ alignment buttons ၄ ခု ရွိတာကို ေထာက္ျပပါ။
-
Left align: Aligns all selected text to the left margin
-
Center align: Aligns text an equal distance from the left and right margins
-
Right align: Aligns all selected text to the right margin
-
Justify: Text is equal on both sides and lines up equally to the right and left margins; many newspapers and magazines use full justification
-
အခုကေတာ့ ေအာက္က စာသားကို အလယ္ကို ညိွပါမယ္။
-
စင္တာကို ညိွထားမယ္လို႔ ေရြးပါတယ္။

-
စာသားေတြကို ညိွလိုက္တာေတြ႔ရပါတယ္။
Line and paragraph spacing
စာသားေတြၾကား ေနရာ ခ်ဲျခင္း၊ စာပို္ဒ္ေတြၾကား ေနရာခ်ဲျခင္း ကို သရုပ္ျပရပါမယ္။
မူလက တေၾကာင္းစာပဲ ခ်ဲထားပါတယ္။ အက္ေဆးေတြ ရီပို႔ေတြ ေရးတဲ့အခါ စာေၾကာင္းေတြကို တေၾကာင္းနဲ႔ တေၾကာင္း ၂ ေၾကာင္းျခားတာ၊ တေၾကာင္းခြဲျခားတာေတြ ဖတ္လို႔ ထင္ရွားေအာင္ လုပ္ၾကရပါတယ္။
To format line spacing:
-
စာေၾကာင္း ခ်ဲခ်င္တာကို အရင္ေရြးပါ။
-
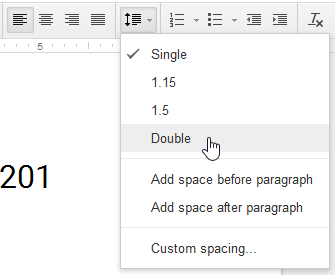
Line spacing button ကို ဆြဲခ်ပါ။ အဲသည္မွာ ခ်ဲခ်င္သေလာက္ ေနရာကို ေရြးပါ။
-
စာေၾကာင္းေတြ ၾကားမွာ စာ ၂ေၾကာင္းစာ ေနရာလြတ္အျဖစ္ အလိုအေလ်ာက္ ခ်ဲေပးပါတယ္။
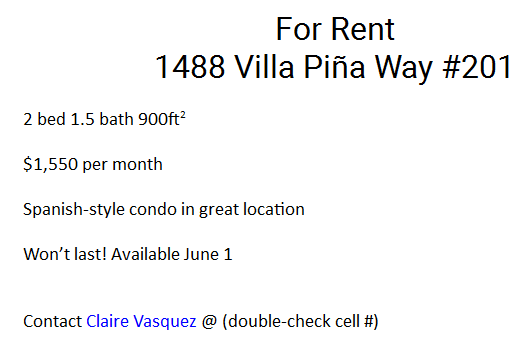
Paragraph spacing
စာေၾကာင္းေတြၾကား လိုင္းခ်ဲတာက တနည္း။ ေနာက္တနည္းကေတာ့ သာမန္စာေၾကာင္းနဲ႔ စာရိုက္ထားျပီး စာပိုဒ္ေတြၾကားထဲမွာမွ ေနရာခ်ဲတာက ေနာက္တနည္း ျဖစ္ပါတယ္။ ဒါက ကိုယ့္စာပိုဒ္ ခြဲရာမွာ ထင္ရွားေအာင္၊ ေခါင္းစဥ္ေတြ ေခါင္းစဥ္ငယ္ေတြ ခြဲျပီး ေဆာင္းပါးကို စီစဥ္ရတဲ့အခါမွာ သိသာေအာင္ လုပ္ရတာ ျဖစ္ပါတယ္။
To format paragraph spacing:
-
မိမိရိုက္ထားတဲ့ စာပိုဒ္ တခုလုံးကို ေရြးပါ။
-
Line spacing button ကို ဆြဲခ်ပါ။
-
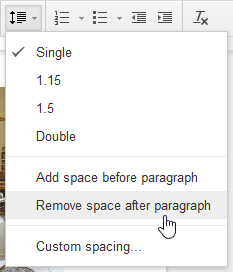
Add space before paragraph or Add space after paragraph ဆိုတာကို ေရြးပါ။ သူကေတာ့ စာပိုဒ္ မတိုင္ခင္ လိုင္းျခားမလား၊ စာပိုဒ္ျပီးမွ လိုင္းျခားမလားဆိုတာကို ေရြးခ်ယ္တာ ျဖစ္ပါတယ္။

-
စာပိုဒ္ေတြ အခ်င္းခ်င္းၾကားမွာ လိုင္းျခားေပးပါတယ္။ စာေၾကာင္းေတြ ခ်ဲသြားတာ မဟုတ္ပါ။
-
ျပန္ျပီးေတာ့ လိုင္းစေပ့ဇင္ေတြ ပါရာဂရပ္စေပဇင္ေတြ မလုပ္ခ်င္ေတာ့ရင္လည္း ခုနင္က line spacing button ကို ဆြဲခ်ျပီး Remove space before paragraph or Remove space after paragraph.လုပ္လို႔ရပါတယ္။ စာေၾကာင္းေတြ မူလအတုိင္း ျပန္ခ်ဳံ႔ခ်င္ရင္ေတာ့ Single ဆိုျပီး ျပန္ေရြးရုံပါပဲ။
Hyperlinks
ရုံးသုံး အိမ္သုံး ေက်ာင္းသုံး အင္တာနက္ျဖင့္ အလုပ္လုပ္ျခင္းကို သင္ၾကားတာ ျဖစ္ေတာ့ အင္တာနက္လိပ္စာေတြ အီးေမးလိပ္စာေတြဆိုတာ မိမိေဆာင္းပါးေတြ စာေတြမွာ မရွိမျဖစ္ ပါ၀င္လာပါတယ္။ သည္ေတာ့ အဲသည္ လိပ္စာကို ကို (A hyperlink is a link to a web address (or URL)) လိ႔ု ေခၚပါတယ္။
အဲဒါေတြကို ရိုက္ထည့္ထားျပီးေတာ့ တမူထူးျခားမႈအျဖစ္ မိမိ ေဒါ့ကူးမင့္ထဲကေန ၀က္ဆိုက္ဆီ တန္းသြားႏိုင္ေအာင္ ေမာက္စ္ကို ကလစ္လုပ္ျပီး သြားႏိုင္ေအာင္ link ေတြ ထည့္နည္းကိုလည္း သရုပ္ျပရပါမယ္။
To insert a hyperlink:
ဟိုက္ပါလင့္ကို ထည့္တဲ့ဆီမွာ ၂ နည္း ရွိပါတယ္။ တနည္းကေတာ့ ၀က္ဆိုင္လိပ္စာ အျပည့္အစုံကို ထည့္သြင္းတာ ျဖစ္ပါတယ္။ http://www.apple.com/ipad လို႔ ေပၚေနတာေပါ့ ။ သူက ၀က္ဆိုက္စာသားအျပည့္အစုံကို Blod with Underline လုပျ္ပီးေတာ့ ျပပါတယ္။ ေမာက္စ္ အေပၚမွာ သြားထားလိုက္ရင္ ေမာက္စ္ကလစ္လုပ္စရာ လက္ကေလး ေပၚလာပါတယ္။ ေနာက္တနည္းကေတာ့ လင့္လိပ္စာၾကီး တခုလုံး အရွည္ၾကီး မေပၚဘဲနဲ႔ အခုလို Apple iPad ဆိုျပီး ကိုယ္ေပၚေစခ်င္တဲ့ စာေၾကာင္းေလးက အစားထိုးေပၚေနတာမ်ဳိး ျဖစ္ပါတယ္။ အဲသည္လို လုပ္နည္း ၂ နည္းလုံးကို သင္တန္းဆရာက သရုပ္ျပရပါမယ္။
-
ဟိုက္ပါလင့္ခ္ လုပ္ခ်င္တဲ့ စာသားကို ေရြးခ်ယ္ပါ။
-

-
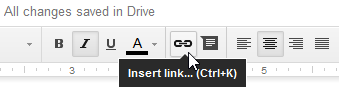
အဲသည္မွာ Tool Menu ကေန Insert Link ကို ဆြဲခ်ပါ။
-
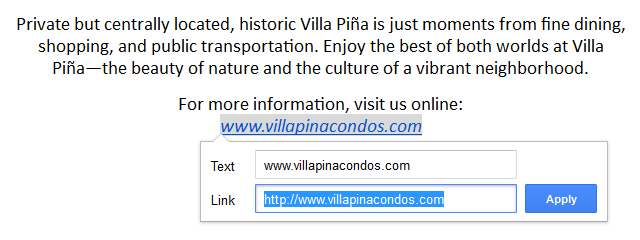
Edit Link ပုံးကေလး အကြက္ကေလး ေပၚလာပါမယ္။ Text field မွာ ကိုယ္ေပၚေစခ်င္တဲ့ စာသား ၾကိဳက္တာ ထည့္ႏိုင္ပါတယ္။ ၀က္ဆိုက္လိပ္စာပဲ ထည့္ရမယ္ မဟုတ္ပါ။
-
မပ်က္မကြက္ Link field မွာေတာ့ မိမိညႊန္းခ်င္တဲ့ အင္တာနက္လိပ္စာကို ထည့္ပါ။ ၂ ခု စလုံးမွာ အင္တာနက္လိပ္စာေတြခ်ည္း ထည့္လည္း ရပါတယ္။
-
-
အဲသည္မွာ မိမိေပၚေစခ်င္တဲ့ အင္တာနက္လိပ္စာကို ႏွိပ္ျပီး တန္းသြားလို႔ရတဲ့ Hyperlink အျဖစ္ ေပၚပါျပီ။
-
ကလစ္လိုက္ရင္ အဲသည္၀က္ဆိုက္ကို ေရာက္သြားပါလိမ့္မယ္။
အဲသည္လိပ္စာကို ျပင္ခ်င္ ျဖဳတ္ခ်င္ရင္ အဲသည္လိပ္စာကို ကလစ္ ႏွိပ္ပါ။ အဲသည္မွာ Chane | Remove ဆိုျပီး ေျပာင္းလို႔ ျပင္လို႔ ရပါတယ္။

အိမ္စာ
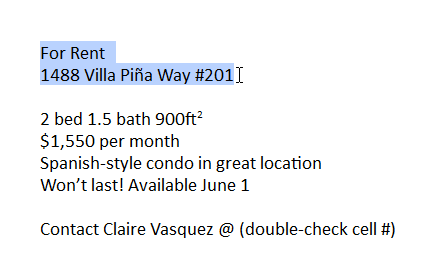
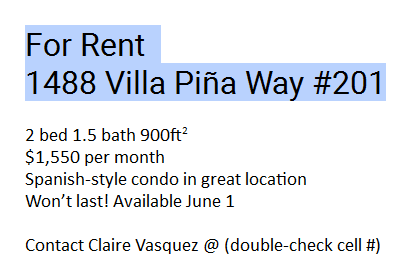
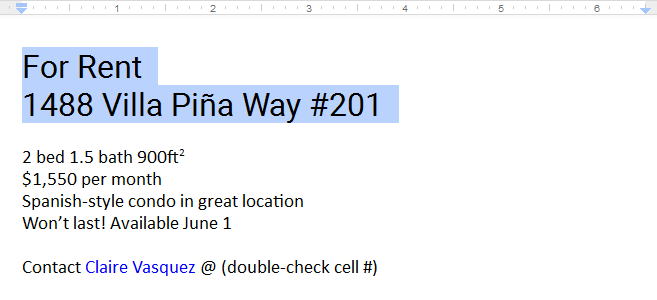
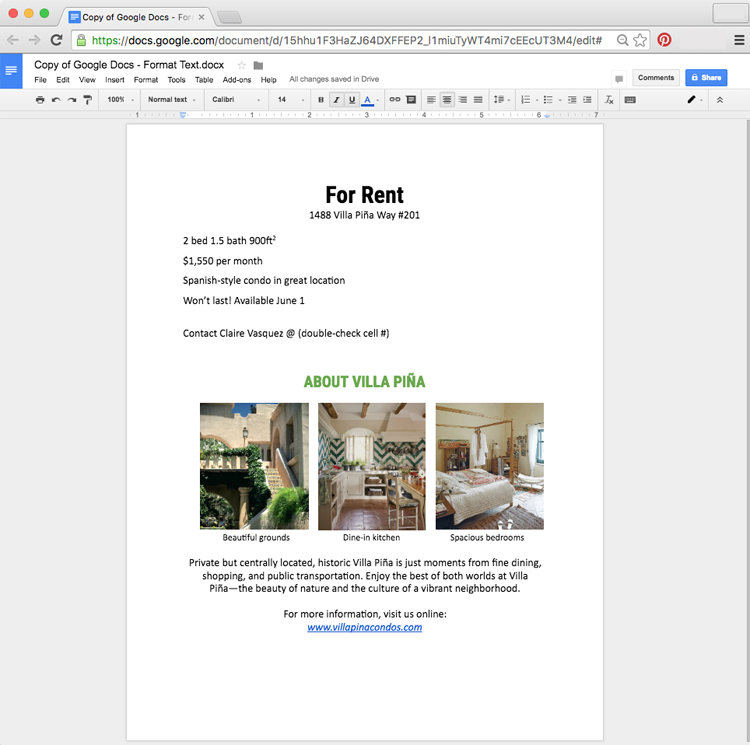
ဒီစာရြက္ကို ျပန္ရိုက္ပါ။ သို႔မဟုတ္ ေကာ္ပီကူးပါ။
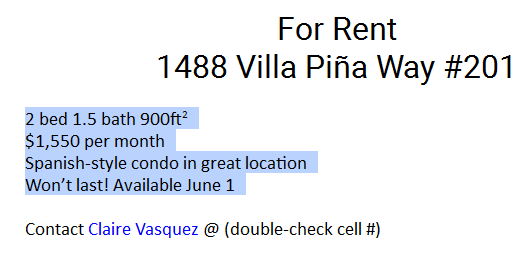
For Rent
1488 Villa Piña Way #201
2 bed 1.5 bath 900ft2
$1,550 per month
Spanish-style condo in great location
Won’t last! Available June 1
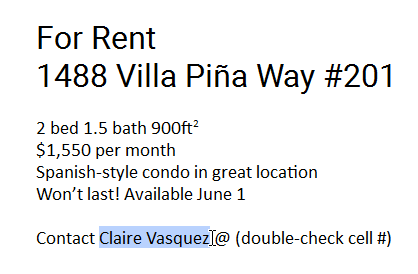
Contact Claire Vasquez @ (double-check cell #)
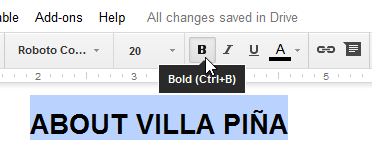
ABOUT VILLA PIÑA
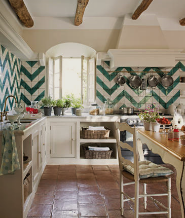
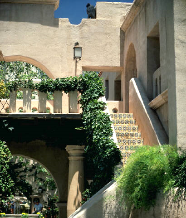
Beautiful grounds Dine-in kitchen Spacious bedrooms
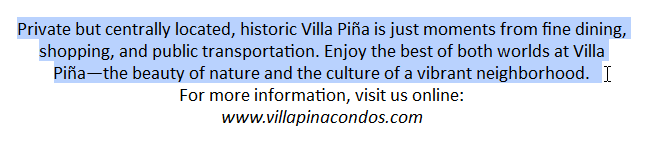
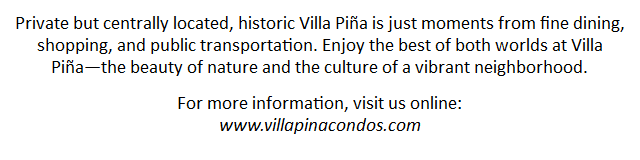
Private but centrally located, historic Villa Piña is just moments from fine dining, shopping, and public transportation. Enjoy the best of both worlds at Villa Piña—the beauty of nature and the culture of a vibrant neighborhood.
For more information, visit us online:
www.villapinacondos.com
-
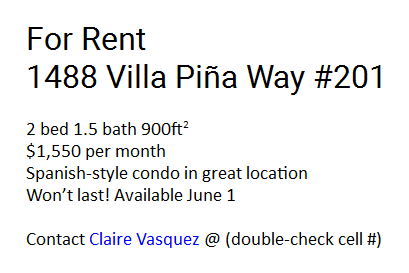
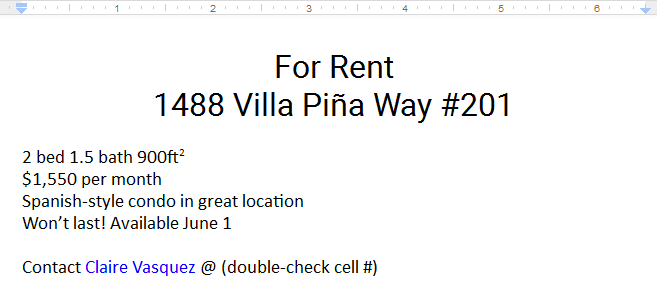
ပထမ ၂ေၾကာင္းကို center align လုပ္ပါ။
-
2 bed 1.5 bath က စျပီး Won’t last! Available June 1 အဆုံးအထိ ေရြးခ်ယ္ပါ။ line spacing ကို 1.5 ေျပာင္းပါ။
-
For Rent ကို font ေျပာင္းပါ။
-
For Rent ကို font size to 30 pt and bold လုပ္ပါ။
-
ABOUT VILLA PIÑA ကို font color အစိမ္းေျပာင္းပါ။
-
ေအာက္ဆုံး စာေၾကာင္းကို hyperlink ေျပာင္းေပးပါ။
-
ဒီလို ျဖစ္သြားမယ္ေပါ့။
(ဆက္လက္ ေဖာ္ျပပါမည္)